DC 100V 100A Voltmeter Ammeter 0.28″ 5 Wires Red Led Digital Dual Without Shunt at Best Price
In stock
- Operating Voltage: 5V DC
- Current Consumption: <60mA
- Testing Voltage: 0-100V
- Testing Current: 1-100A
- Easy to read even in dim light
₹189.00 ₹699.00 (Price Excl. GST) ₹160.17
In stock
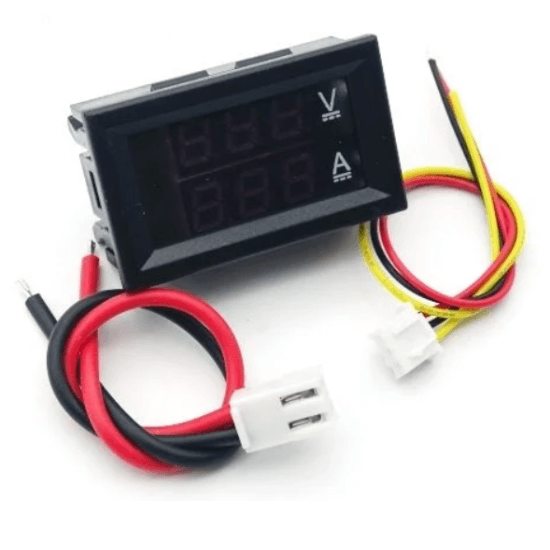
CompareThis is 0.28″ 5 Wires Red Led Digital Dual DC 100V 100A Voltmeter Ammeter. This meter will measure up to 100 VDC with a 0.1-volt resolution.
One thing to note is, this voltmeter ammeter has 2 wiring harnesses. One harness is to provide power for the meters, the 2 poles with a RED and a BLACK lead. Small size, and portable, the magnitudes of voltage and current are displayed on the same screen at the same time.
The DC 100V 100A Voltmeter Ammeter with 0.28″ red LED digital display is a dual-function device designed for accurately measuring both voltage and current in a DC circuit.
voltmeter ammeter can be supplied anywhere from 6 volts DC up to 30 VDC. This voltmeter ammeter is a separate power supply that is isolated from the source, it is possible to use the same supply but it seems to affect the amp meter reading.
The 3-wire harness is used for a ground that connects directly to the battery or supply ground of the load.
This Voltmeter Ammeter features a compact design and utilizes five wires for easy installation and connection.
Note: There are two different wiring variants (i.e. yellow wire and Green wire ) with the same working functionality available which will be shipped randomly. Use the following guidelines according to your version.
CASE 1: Onboard Wiring Instructions for “Yellow” Wire Connection
1. Thin Red Wire (VCC): positive pole of power supply input (4.5-30V)
(Note: if the measuring signal is less than 30V and the power is adequate, can be the power supply of the module)
2. Thin Black Wire (GND): the negative pole of power supply input (4.5-30V, common ground with measuring signal)
3. Green Wire (VIN): positive pole of measuring signal input (0-100V)
4. Thick Red Wire (I+): positive pole of current input (series connected on the power supply cathode)
5. Thick Black Wire (I-): the negative pole of current input (series connected to the power supply cathode)
Note: If the input voltage is more than 5V, then, please use a buck converter.
Note: This Product Does Not include a shunt.
CASE 2: Onboard Wiring Instructions for “Green” Wire Connection
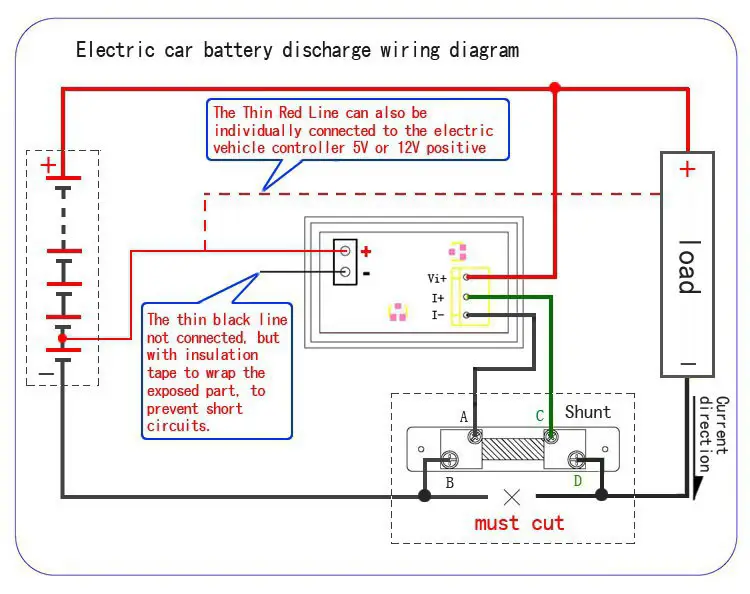
(The current range of 10A requires the external shunt connection process)
1. Connect the lines which are not connected well, and do not touch other places.
2. The shunt is connected to the negative pole of the measuring system (the shunt itself does not distinguish the direction, and the connection is fixed to the two large screw holes in the distributor.
3. According to the current direction, the green line (+) and the black line (-) of the three lines are respectively screwed on the two small screws of the shunt.
4. Connect the red line of the three lines to the positive pole of the measuring system.
5. The power supply line in the two lines is connected to the appropriate power supply (and the voltage between the black lines in the three lines. It is suggested to be connected to the 12V, at the same time, the electric power black lines in the two lines are wrapped with insulating tape, so do not encounter other places, so as not to cause a short circuit).
6. The above 1-5 steps are suitable for the use of common ground; for independent power supply occasions, the red and black lines of the power supply in two lines are respectively connected to both sides of the positive and negative poles of the power supply (the power supply voltage <28V, suggested to be about 12V).
Connection Diagrams:
Features :
- It measures up to 100V and 100A DC.
- Very handy and small in size.
- It requires a power supply of 5V.
- 100% Brand new and high quality.
Package Includes:
1 x Dual LED Panel Ampere Voltage Meter.
Note: The package does not include Shunt Resistance for 100A. It is a display only and not a measuring instrument.
Specifications
| Accuracy | 1 |
|---|---|
| Color: | Red |
| Operating Voltage (VDC) | 5 |
| Current Consumption (mA) | 60 |
| Test Voltage (V) | 0 to 100 |
| Test Current (A) | 1 to 100 |
| Refresh Speed (ms) | 500 (one time) |
| Operating Temperature Range (°C): | -10 to 60 |
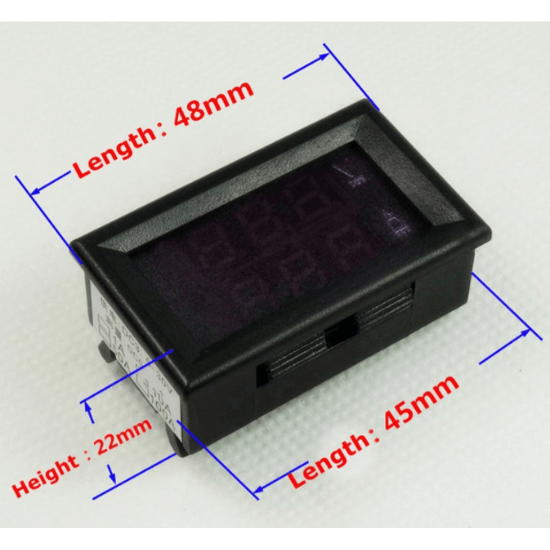
| Height (mm) | 30 |
| Length (mm): | 20 |
| Width (mm) | 50 |
| Shunt Resistor Dimensions (mm) | 120x25x20 (LxWxH) |
| Weight (g): | 14 |
| Shipping Weight | 0.018 kg |
| Shipping Dimensions | 7 × 4 × 3 cm |
Shipping & Returns
Due to the type of products we sell, we accept limited returns. Below are the conditions where we can accept a return request.
MANUFACTURING DEFECT
If you receive a product with a manufacturing defect, please notify us within 1 day of receiving the product, supported by the proper pictures and description. Once our support team accept the return, we will provide a replacement or a complete refund including the return shipping cost.
WRONG ITEM SHIPPED
If you receive a different product than the ordered one, please contact us within 1 day of receiving the product, supported by the proper pictures and description. Once our support team accept the return, we will provide a replacement or a complete refund including the return shipping cost.
LIMITATION OF RETURNS
We don’t accept returns for products damaged by improper use of the product. Moreover, we don’t accept the return if the ordered product is unsuitable for any specific application. Please read the product specifications and datasheet before selecting and ordering a product.
WHAT VOID WARRANTY?
If the product is subject to misuse, tampering, static discharge, accident, water or fire damage, use of chemicals & soldered or altered in any way.
SHIPPING
We ship all over India. Please contact our support team at info@inventkart.com for any questions related to shipping.
Based on 0 reviews
Be the first to review “DC 100V 100A Voltmeter Ammeter 0.28″ 5 Wires Red Led Digital Dual Without Shunt at Best Price”
You must be logged in to post a review.


There are no reviews yet.